Are you looking for a way to improve security at your rentals? Are you considering installing a Ring Floodlight Camera? Do you need to mount one under an eave but aren’t sure how? Read on!
My car was recently broken into.
I was lucky because they didn’t steal anything from my ancient Honda Accord. Not even my Phil Collins greatest hits CD (priceless)!

…But Seriously (sorry, I couldn’t help it.)
I thought I was covered security video-wise with the Ring Video Doorbell I installed a few months ago. Unfortunately, the thieves didn’t come into the range of that camera so I couldn’t see who did it.
So I decided to install a Ring floodlight cam (actually my wife decided for me). I needed to install it underneath an eave on my garage but the Ring website says you can’t do this. You absolutely can. I will show you how.
I now have 100% view of anyone approaching my house from the driveway. Now I will know who does and doesn’t like classic 80s music!
In this article I will:
- Review the benefits of a Ring Floodlight Camera for landlords and tenants
- Show you what’s included in the box and what extra tools you might need
- Give you tips and instructions for mounting the Ring floodlight cam under an eave
- Guide you in setting up a Ring floodlight cam for a tenant account
3 Landlord Benefits of a Ring Floodlight
Increased Property Security
A landlord has a responsibility to keep their tenants safe. This means outside the house as well as the inside. A Ring Floodlight Camera acts as a deterrent to would be criminals.

It has a not-so-inconspicuous camera that lets people know they are being watched. You can speak to people through the device and even set off a loud alarm. At over 100 decibels, your neighbors will take notice too.
List Your Rental As A “Smart Home”

You can make your rental stand out from the clutter buy listing your home’s smart features. Anything that saves your tenant money, is more convenient or adds to their safety will be valued. Tenants pay for value.
According to one study, condo renters and millenials were most persuaded by rentals marketed as a “smart home.” Smart Thermostats, Smart Lighting and Video Lighting were the most sought after amenities.
Attract Better Tenants
Safer homes attract better tenants. People with higher incomes can and will pay more to live in a safer neighborhood and rental property.
If you are targeting millennial renters, smart home features like a Ring floodlight cam are definitely one way to entice them to rent from you. Another survey suggested 86% of millennials are more likely to rent a property with smart home features.
4 Tenant Benefits of a Ring Floodlight
Personal Security
Your tenants will appreciate the extra home security as much as you will. Probably even more. Safety and security ranks right up there with location and number of bedrooms when tenants are deciding where to rent.
A ring floodlight camera provides security in a couple of ways:
- Lighting – It enhances home security by providing lighting when and where needed
- Video – It records any movement it detects so you can see what’s happening in real time or after it happened
- Neighborhood Alerts – Perhaps one of the best features of Ring video devices is the Neighbors feature
Neighborhood Alerts
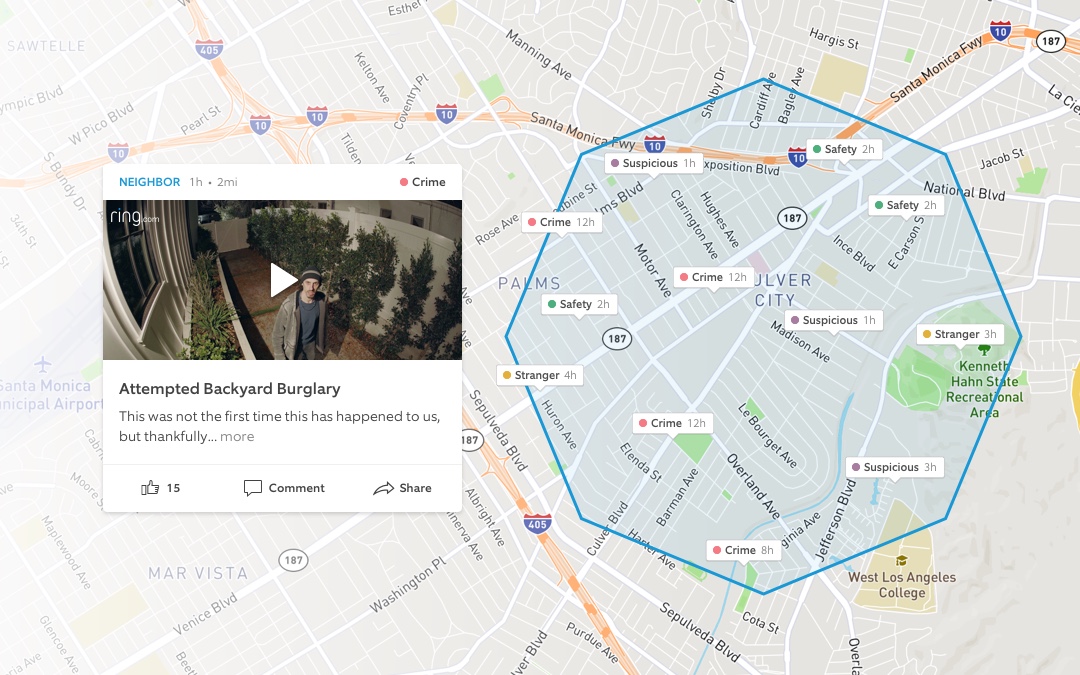
Ring is on a mission to reduce crime and the Neighbors feature allows Ring device owners to help fight local crime.
Ring Neighbors allows your tenants to see what other Ring devices in their neighborhood have captured. This gives your tenants knowledge of safety issues in the local neighborhood such as suspicious activities or wild critters roaming backyards.
In my prior article about my Ring Video Doorbell, I mentioned that I was having trouble connecting to this feature. However, that seems to have been fixed. As soon as I installed the new Ring floodlight device I was able to connect to the neighborhood reports.

I installed my Ring Floodlight Camera shortly after Halloween. Most of the videos in the Neighbors reports were about kids stealing candy. And some adults too!
In fact, Neighbors has proven so popular, that Ring has created a stand alone Neighbors app that anyone can use even if they don’t have a Ring device.
Convenience
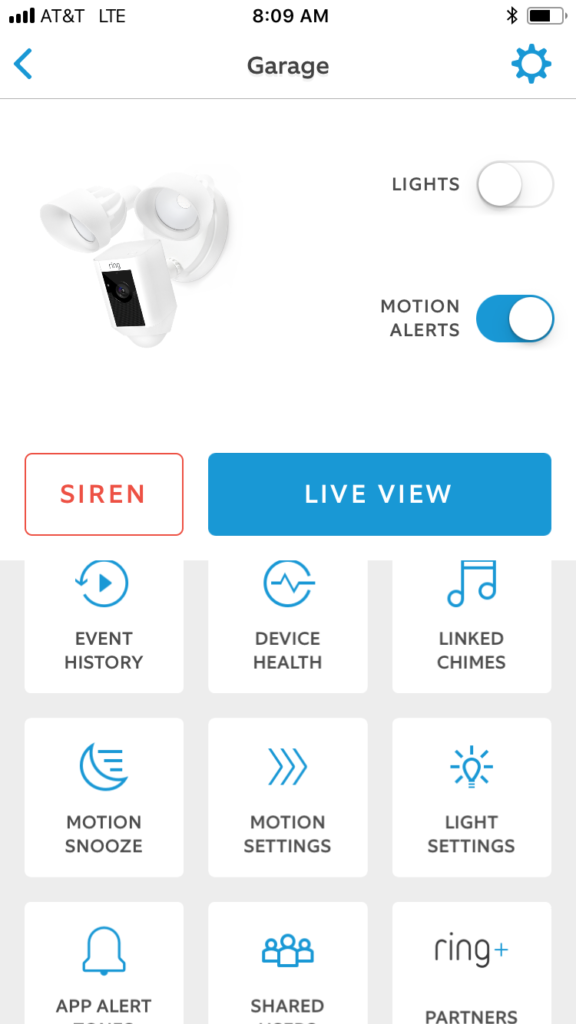
Tenants love convenience. Ring Floodlight Cameras are totally programmable providing a convenient lighting feature to your rental.
Light Schedule
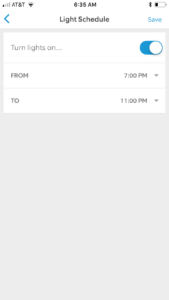
Your tenant has the option of setting the times that they want the light to be on and off. This is not only convenient but also a potential money saving feature as well.
Motion Scheduling
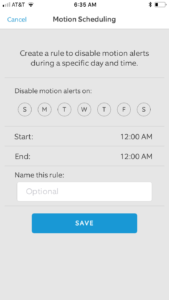
In addition to the programmable light feature, it’s also a programmable motion detector. Your tenant can add rules that control when the motion sensor will trigger an alert.
Motion Zones

Your tenant also has the convenience of setting the motion zones. This will ensure they are covering the areas they want covered and not getting unnecessary alerts.
Video Recordings
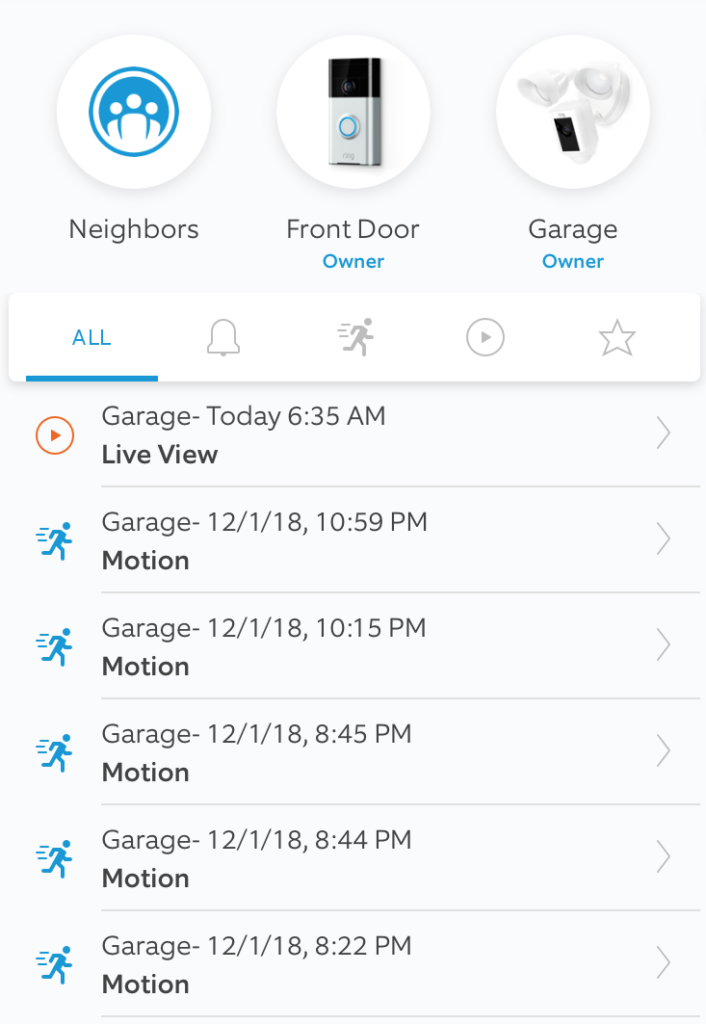
Another benefit to your tenant when you install a Ring floodlight cam is that they will have access to recordings of everyone who’s come to the property. They will know when packages are delivered, what time maintenance stopped by, etc. They can also use the videos to file a police report and help catch criminals.
Each one of the alerts in the image above is a video that can be reviewed and saved. It’s another way you, as a landlord, can provide extra peace of mind to your tenants by knowing they can check on their property from anywhere in real time or after an alert.
What’s In The Box
Ring tells you everything you need is in the box and this is true if everything goes as planned. Nothing ever goes as planned when it comes to these things. I am always trouble shooting and improvising whenever I do handy work. This was no exception.
Here’s what’s included in the box and a few other tools I needed to finish the Ring floodlight cam installation.
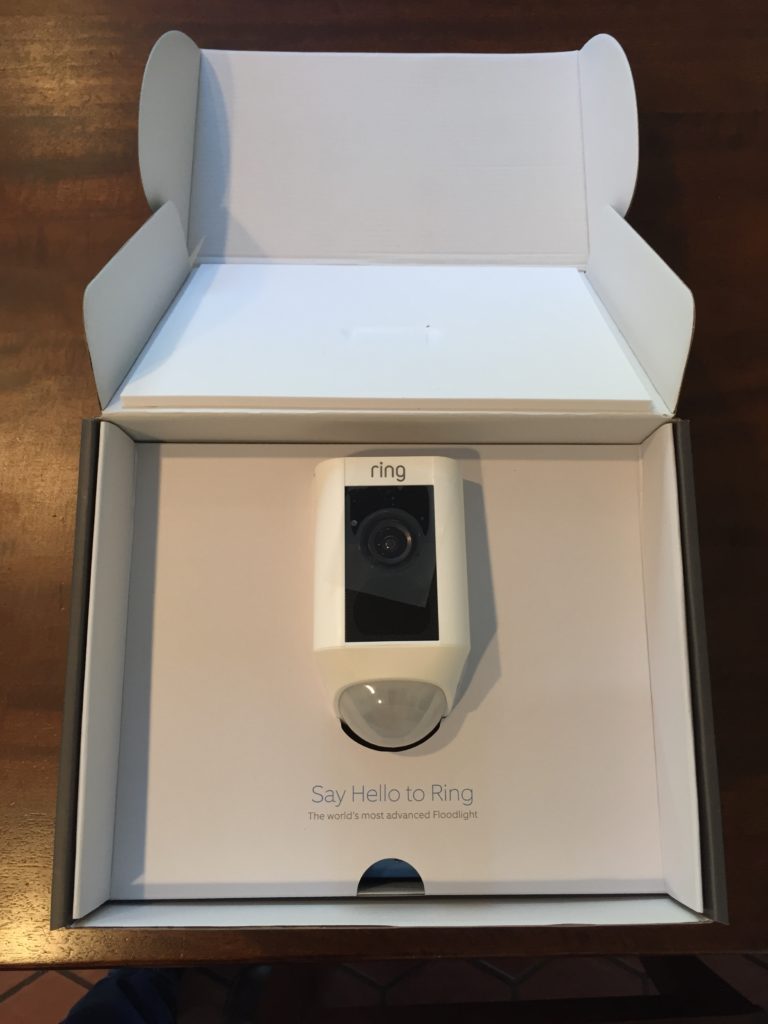
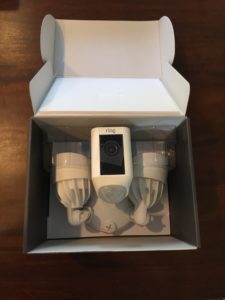
Inside the box you will find the following:
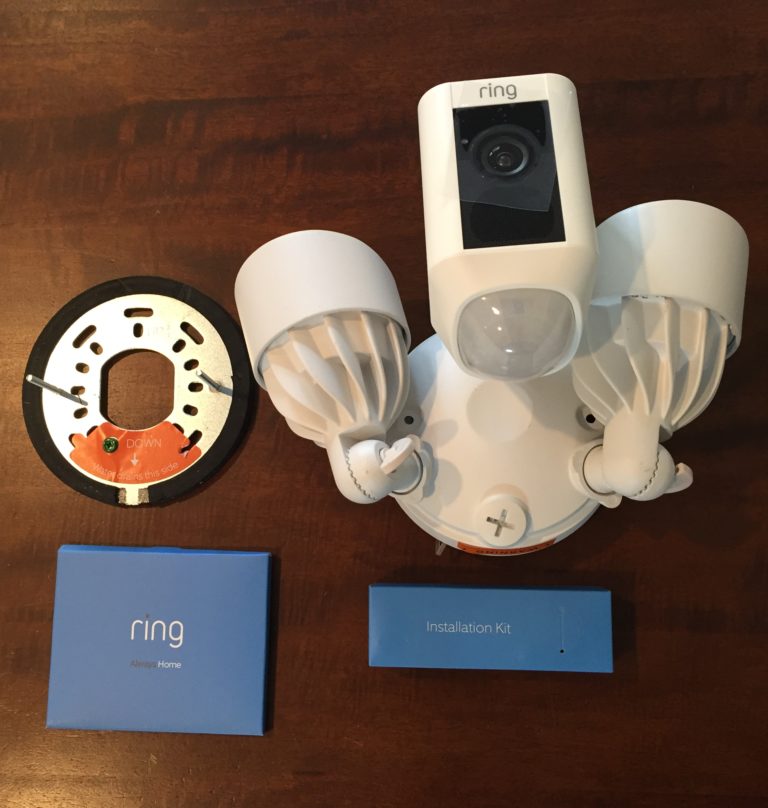
- Mounting Bracket – This attaches to your junction box and provides a water tight seal
- Ring Floodlight Camera
- Booklet & Stickers – See below for contents
- Installation Kit – See below for contents
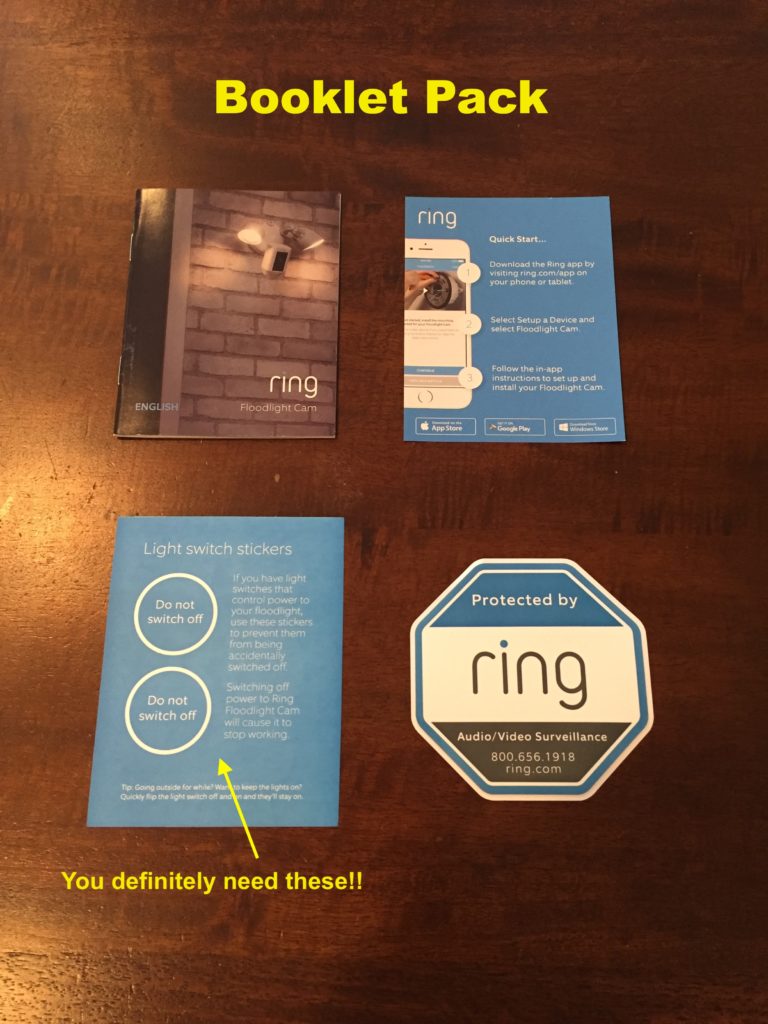
The Booklet Pack contains the following:
- Ring Floodlight Cam Manual – A step-by-step installation guide
- Quick Start Guide – App installation instructions
- Light Switch Stickers – Use these to tell your tenants not to touch the switch that powers the Ring Floodlight. If your rental is wired like most homes, the junction box is controlled by a switch. If you shut this switch off, the Ring floodlight cam loses power and it’s ability to secure your rental. You will definitely need these.
- Ring Protection Sign – Throw this out. You don’t need to tell anyone you installed a RingFloodlight Camera. They are giant by design.

The Installation Kit contains the following:
- Various Screws – You may find these useful. They were too short for my way-too-recessed junction box so I had to improvise.
- Screw Cap Nuts – These are inside the Bag ‘O Screws (see compartment “F” above). This is the only thing holding up your Ring Floodlight Cam if you mount it upside down like I did. Don’t lose these. I can’t imagine they are easy to replace.
- 3 Wire Nuts
- Hook – To help hold the heavy Floodlight while connecting the wires
- Ring Screwdriver – I didn’t need it. I’m not even sure what the special end is for but I’m guessing it’s the same screwdriver that comes with the Ring Video doorbell. You need that special end to access that Ring Doorbell device.
Although the Ring floodlight cam comes with (mostly) everything you need, I ran into a couple of snags. You may need to get a couple of other tools to complete the installation of your Ring Floodlight Cam.
3/4″ Grinding Bit

If you plan to mount your Ring Floodlight Camera upside down underneath an eave, you may want to grind away some material so you can get a full view of the area you wish to monitor. This simple grinding bit was easy to use. It fit right into my cordless drill and took all of 60 seconds to grind away a groove big enough so the camera could angle high enough.
Grabit Pro Screw Extractor

I was replacing my very old Floodlight. I estimate it was installed right around the time Phil’s solo album Face Value which debuted in 1981. It was easy to tell by the layers of paint.
The screws were completely stripped. Luckily, I had the Grabit Pro Screw Extractor Kit. This thing has saved me from several snags and never let me down yet. I highly recommend you invest in one if you do any home improvement projects! Don’t wait. Get one before you need it.
Installation Tips For Mounting Your Ring Floodlight Cam Under An Eave
I hesitated to pull the trigger on the Ring floodlight cam because they explicitly tell you it is not designed to be mounted under an eave. A serious design flaw. If you need to mount it upside down like I did, don’t worry, it can easily be adjusted to mount upside down.
Here are the steps you will need to take to mount your Ring Floodlight Camera under an eave.
Step 1 – Rearrange the lights
When you take your Ring Floodlight out of the box, you will notice the camera is already positioned upside down for protection while shipping.
You will need to rotate the floodlights for horizontal mounting. The overhang on the light should be on top. This is probably designed to keep water off of the floodlight lenses and to redirect the light back down.
To rearrange the floodlights simply loosen the toggle bolts that hold the lights in place and rotate the lights 180 degrees.
Tighten the bolts again but not too tight. You will need to adjust them when you mount them and you don’t want to fight with the bolt when it’s hanging upside down and you are on a ladder.
Step 2 – Test the camera angle
Depending on how large the area that you want to monitor is, you may need to modify the Ring Floodlight Camera to be able to capture a full view. There is no way to know for sure until you turn the camera on after you have mounted it but you can roughly gauge if the camera looks like it will cover the area you want to monitor.
There’s probably a mathematical way to figure this out before you mount the device, but I was never good at trigonometry so I’m not even going to attempt it.
I’m sure there is a mathematical solution to this problem but I just eyeballed it.
Instead of pulling out my protractor, I simply held the Ring floodlight cam up in the location where I was going to mount it. Doing this, I could roughly gauge how far the ring device was going to cover.
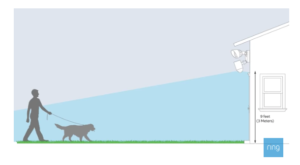
The key is to ensure the motion sensor is parallel to the ground. See image below.

I have a short driveway so I didn’t need the ring device to monitor that far out. Although it looked like I would be OK without modifying the ring floodlight camera. I decided to go ahead to the optional step.
Step 3 (Optional) – Adjust the camera angle
Ring says you cannot mount the device upside down because that interferes with the waterproofing. However this is bogus when you are mounting it underneath an eave. It’s actually more waterproof this way!
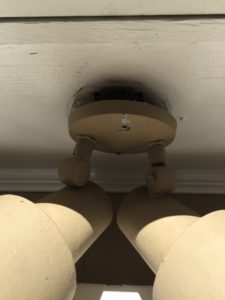
The real reason you might not be able to mount it upside down is because the Ring camera has a limit on how far down it can go. Or in the case of mounting it upside down, how far up it can go. See the image below to see what I mean.
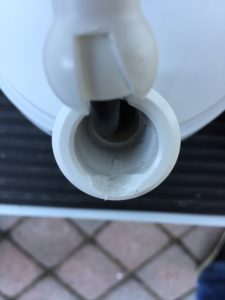
As you can see the image above the Ring Floodlight Camera can only go so far because they did not design a separate groove for mounting it upside down. This limits how far you can see with the Ring camera when it is mounted upside down.
However, this is actually pretty easy to fix.
I found this great Youtube video from Blueglow Electronics when I was searching for a solution. Go ahead and check it out for a full tutorial on how to fix this design flaw.
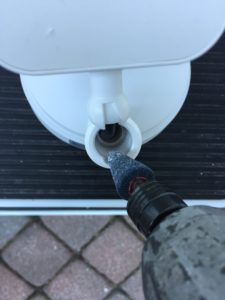
I followed his advice and I picked up this very inexpensive and very effective grinding point bit that fit inside my cordless drill.
It only took me a few seconds to grind enough material away to allow the Ring Floodlight Camera to angle further upwards when mounted under an eave.
Caution. Be careful that you don’t accidentally grind away the insulation on the wires. I was very careful but I still managed to nick the wire superficially a couple of times. I suggest protecting them with electrical tape before you start grinding.
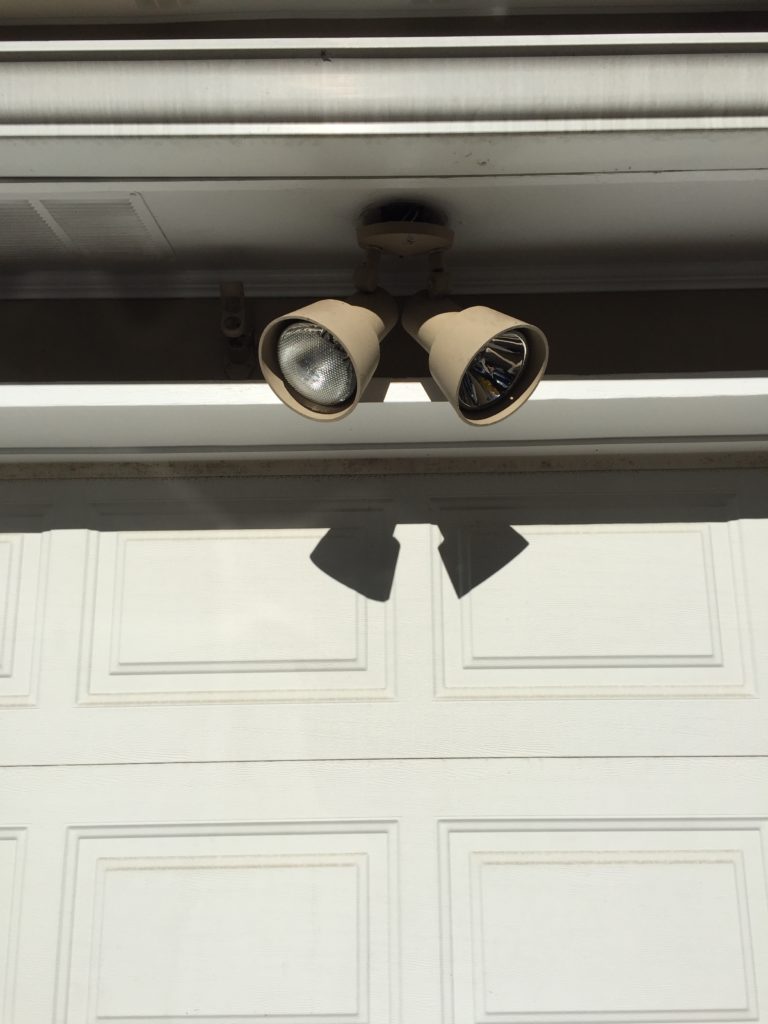
Voilà! My Ring floodlight cam can now see my whole driveway.
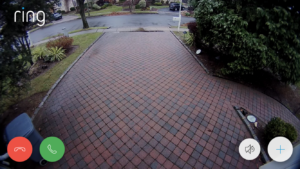
Step 4 – Mount the Ring Floodlight Cam
The final step is to actually install the floodlight camera. Ring has some very helpful installation videos that do a much better job of explaining how to mount this thing than I ever could.
Here are a few observations and tips from my experience from mounting the Ring Floodlight Camera under an eave.
- The ground wire was a little too short. I struggled to be able to properly ground the device. But in the end I was able to make a connection to the ground screw in the junction box. Prep your junction box accordingly by clearing a path to the ground screw before you try to install the Ring cam.
- The Ring Floodlight Camera is a little heavy. It only weighs a few pounds but this becomes very heavy very fast when mounting it upside down and trying to connect the wires. Get a friend to help if possible. Or use the provided hook that is supposed to help you hold it while mounting. I wasn’t smart enough to figure that out until after I installed it.
- The mounting cap nuts that hold the device in place are pretty flimsy. There is not a lot of thread left to truly hold the device especially upside down. If you can, look for stronger nuts that will help ensure the Ring Floodlight cam stays in place.
- You may need a Wi-Fi booster depending on where you mount the ring floodlight camera. If you have a detached garage you may need to boost your Wi-Fi signal to make ring floodlight camera work effectively. Here are some of the top sellers on Amazon.
Unique Features Of The Ring Floodlight Cam
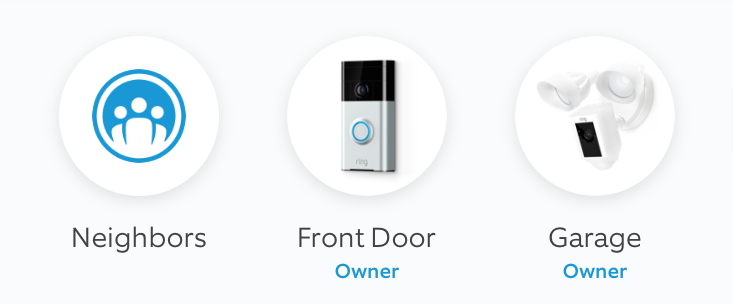
If you already have a Ring device then you will be very familiar with the Ring floodlight cam features. In fact, it works through the same app. If you already have a Ring device and you install a Ring floodlight you will see two devices on your app homepage. It has many of the same features as the Ring Video Doorbell (read 5 Reasons To Install A Ring Video Doorbell In Your Rental to learn more).
Here are a couple of features unique to the Ring Floodlight Camera:
Loud Siren
The Ring floodlight cam comes equipped with a siren feature. So not only can you talk through the device, but you can also alert the neighborhood to any intruders. At 110 dB, roughly the equivalent of a Phil Collins concert, it will definitely get everyone’s attention especially at night. I wonder if I can get it to play Sussudio to scare away criminals?
Custom Motion Zones
The Ring Floodlight Camera allows you to set a custom shape of the area from which you want to detect motion. Everybody’s yard or driveway is different so this is a really smart feature. It limits the motion feature to your unique home’s view.
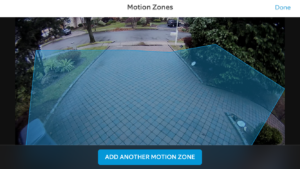
This is different than the Ring Video Doorbell which only allows you to control motion in increments of concentric half-circles. See below.

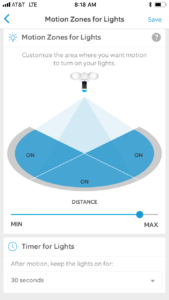
Motion Zones For Lights
You can also adjust the distance at which the motion lights will turn on as well as the length of time they will stay on.
Light Schedule
You can also use the Ring floodlight cam as a preset timer. However, it only allows for one set of “From” and “To” schedule. You can’t set multiple schedules throughout the day or adjust which days to schedule the lights. Hint to Ring. That would be a great additional feature if you are reading this.

How To Reset A Ring Video Camera For A New Tenant
Resetting the Ring Floodlight Camera for a new tenant is very easy. Unlike other Ring devices where you need to open it up to press the reset button, the Ring floodlight cam has a very convenient reset button on top.
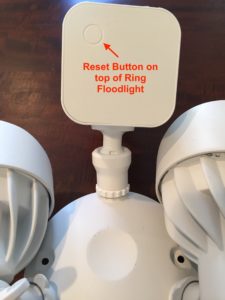
Once your new tenant has their Wi-Fi up and running, all they have to do is press and hold that reset button and follow the instructions on the app. The Ring Floodlight Camera will actually talk to you while you are setting it up and give you a status update.
My Ring Customer Service Experience
I ran into a problem after I installed the Ring Floodlight Camera. I set it up and was able to get a Live View feed for all of 3 seconds before it died. Maybe it was because I accidentally shut off the power source while it was just starting up. Who knows?
Caution – If you have a switch that controls the power to the Ring floodlight cam, make sure to use the “don’t touch” stickers they give you!
The Ring device had power and the lights worked but I couldn’t connect it to my WiFi again. I kept getting this error message:
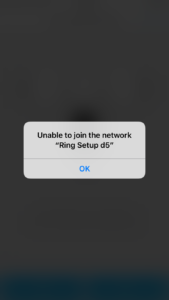
I got online with Ring and they helped me troubleshoot the problem for a while. 59 minutes to be exact (they send a transcript of the chat afterwards). Nothing worked. They needed to send me a replacement unit.
Ring will give you the option of exchanging the device at the store you purchased it from or they will send you a new device. I opted for the latter.
It took less than 5 days to get the replacement device. I packed up the old one and sent it back to them using the prepaid postage they provided.
Note – You must return the old unit within 30 days or you will be charged for the replacement unit.
All in all I would say it was a pretty good customer service experience. They really tried to help me trouble shoot the problem but then offered to quickly replace my Ring floodlight cam when it couldn’t be fixed. Kudos to Ring for excellent customer service!
Conclusion
If you’ve been thinking about installing a Ring floodlight cam in your rental or your own home but have been hesitating because you need to mount it upside down, don’t wait. With one simple hack you can enjoy the protection and benefits of a Ring Floodlight Camera.
As landlord you will enjoy the following benefits:
- Improved property security
- Listing your rental as a “Smart Home”
- Attracting higher quality tenants
While your tenant will appreciate:
- Improved home and personal security
- Ring Neighbors alert system
- Convenience of a programmable floodlight
- Access to video recording of whose come and gone on their property
Installation is simple even when mounting under an eave. You may not even need to make any adjustments as I described above. I didn’t need to and it covers more than enough area of my property.
Transferring to a new tenant is as simple as holding the reset button and navigating a few app instructions.
Finally, if you run into any issues as I did, Ring’s excellent customer service will have your back. They will send out a new Ring floodlight cam quickly at no extra charge to you.
Overall I’m liking the extra security and looking forward to installing them on my other properties.
If you’ve been thinking about getting one yourself, I highly recommend it!
Let Me know Your Thoughts On The Ring Floodlight Cam
Have you installed a Ring floodlight cam in your rentals? Did you have to mount one upside down? Have your tenants appreciated the upgrade? Leave me a comment and let me know what do you think.
Want More Money Saving Tips?
Sign up today for the Accidental Rental Newsletter for access to more free money saving tips and tricks to being an awesome landlord!