![You are currently viewing How To Get A House Rent Ready [Punch List Priority Matrix]](https://accidentalrental.com/wp-content/uploads/2019/11/checklist-3944447_640.jpg)
Getting a home rent ready can be daunting if you don’t know where to focus your efforts. Which repairs should you prioritize? What can you do to make your home tenant-proof? What are the tax implications of all these expenses?
It can be overwhelming but I have a system that can help.
Whether you are an accidental landlord getting your home rent ready or you are a real estate investor who just scored your first rental property, my system will help you manage the process.
It’s even helped me streamline my turnovers and avoid over-investing in unnecessary repairs and improvements.
I will share my rent ready system with you in this article.
Specifically, I will show you:
- What to look for during your Walk-Through (Rent-Ready Checklist)
- How to create a Punch List Priority Matrix
- Steps you can take to tenant-proof your home
- How to maximize tax deductions in your first year of operation
Note that this article contains Amazon Affiliate links to products I think you will find helpful. This means I may earn a commission, at no extra cost to you, if you purchase anything through a link and it helps me continue to bring you useful articles like this one. Thanks for your support!
Assessing Property Condition – The Rent Ready Walkthrough
The first step in the process of making a home rent ready is to conduct a thorough assessment of the property’s condition.
The condition of your soon-to-be rental property makes a big difference. It will significantly impact how much rent you can receive as well as how long it takes to rent.
You need to assess how well your home compares to others on the market. And if this was your personal home, you need to be as unbiased as possible. You may have become used to your home’s quirks and faults but a prospective tenant will spot them right away and may be turned off.
Here is a room-by-room list of what to look for during a property walkthrough.
Kitchen Walkthrough
| Refrigerator / Freezer |
|
| Stove / Oven |
|
| Dishwasher |
|
| Microwave |
|
| Cabinets / Drawers |
|
| Countertop |
|
| Garbage Disposal |
|
| Sink |
|
| Exhaust Fan |
|
| Under Sink Cabinet |
|
| Floors |
|
| GFCI outlets |
|
| Fire Extinguisher |
|
Bathroom Walkthrough
| Vanity |
|
| Sink |
|
| Under Sink Cabinet |
|
| Exhaust Fan |
|
| Toilet |
|
| Floors |
|
| GFCI outlets |
|
| Medicine Cabinet |
|
| Towel Racks / Hardware |
|
| Shower / Tub |
|
| Odor |
|
Interior Rooms Walkthrough
| Walls |
|
| Ceilings |
|
| Closets |
|
| Floors |
|
| Light Fixtures |
|
| Outlets & Switches |
|
| Vents and Baseboards |
|
| Doors |
|
| Window Treatments |
|
| Ceiling fans |
|
| Windows |
|
Utilities & Miscellaneous Walkthrough
| Heating |
|
| Central Air Conditioning |
|
| Water Heater |
|
| Sump Pump |
|
| Laundry Room |
|
| Fire Place |
|
| Stairs & Hand Rails |
|
| Smoke & CO Detectors |
|
| Electrical |
|
| Plumbing |
|
| Garage |
|
| Attic / Crawl Space |
|
Exterior Walkthrough
| Siding |
|
| Windows |
|
| Roof |
|
| Chimney |
|
| Gutters |
|
| Deck / Patio |
|
| Balcony |
|
| Lighting |
|
| Doorbell |
|
| Driveway / Sidewalks |
|
Yard Walkthrough
| Lawn |
|
| Fence |
|
| Landscaping |
|
| Sprinkler System |
|
How To Prioritize Rent Ready Repairs That Add Value
Now that you have your punch list (also called a make-ready list), you need to decide which rent ready repairs you must make versus which rental repairs don’t add any value or aren’t necessary.
The reality is that no home makes a perfect rental. Your list will be long. It will include things that are absolutely necessary and things that are nice-to-do’s. However, you don’t want to over-invest in getting ready to rent your home.
Assign rough dollar figures for every item on your punch list. How much will it cost to address all the issues you found? Chances are it would be cost prohibitive.
So how do you know which ones to tackle?
My Punch List Priority Matrix can help.
Punch List Priority Matrix
I like to prioritize my punch list in a 2 x 2 matrix like the one below.
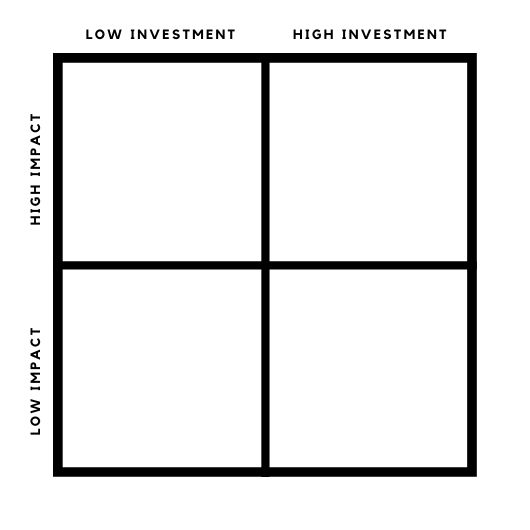
On the vertical axis is Impact. This is my estimate of the relative impact of rent ready projects on a potential renter’s desire to rent my property. In other words, will a renter value this?
On the horizontal axis is Investment. This is an estimate of the relative investment required to complete the project. Don’t forget to include your time investment as well dollar cost.
Here’s how an example Punch List Priority Matrix filled in.
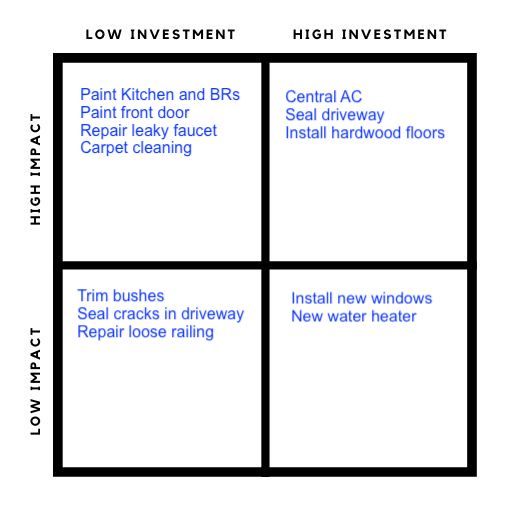
Now let’s look at each quadrant.
High Impact and Low Investment
You should definitely do these projects. These rent ready projects will add value to your tenants in the form of a rental that looks good and is free of nuisances like leaky faucets.
High Impact and High Investment
Consider these repairs if you need to do any of these projects to make your home more competitive. These projects often pay for themselves in the form of lower turnover and vacancy rates but can take a while to payback.
Low Impact and Low Investment
These are repairs that add little to no rental value but don’t cost much either. Often, these can be safety related issues that need to be addressed. You may need to do projects such as replacing smoke detectors out of safety or legal reasons. Just get it done.
Low Impact and High Investment
These are usually big ticket deferred maintenance items. Evaluate these projects on a case-by-case basis. Avoid them if possible or defer them until necessary. Do them if they will address a potential safety issue or make your life easier as a landlord down the road.
For example, It is often better to replace a water heater that is close to the end of its useful life than to deal with a major issue when a tenant is in place.
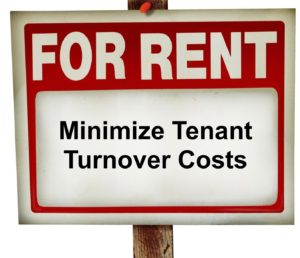
Tenant-Proofing Your Property
My first tip for new landlords in my Top 50 Tips is to tenant proof your home.
It’s impossible to make your home totally tenant proof. However, there are some steps you can take to minimize the damage and expense from turnovers when making your home rent ready.
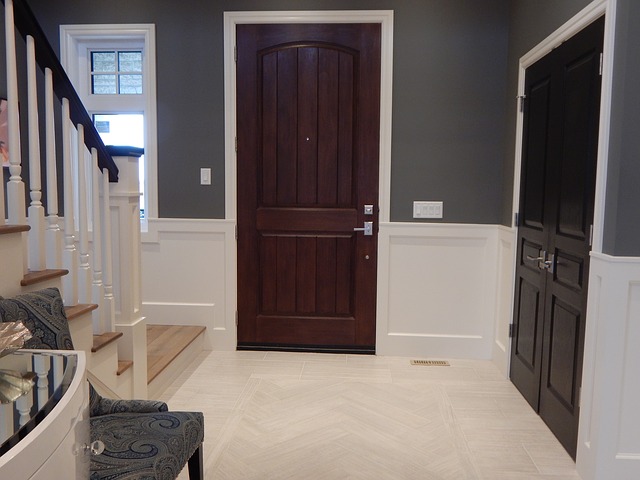
Floors
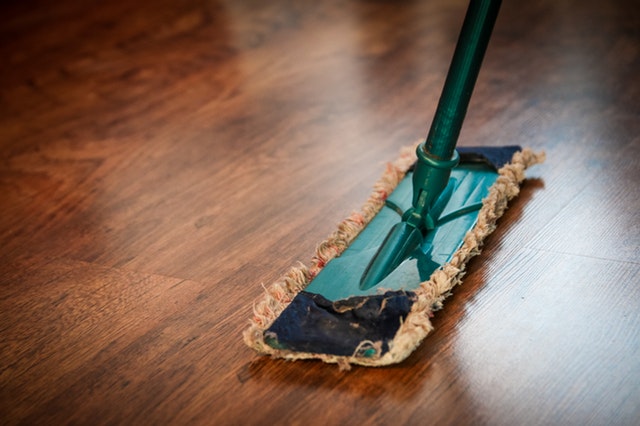
I like to use hardwoods in my rentals. This goes against the advice of most landlords but I think It has a much nicer look and is what my target renter is expecting.
Laminates look and feel cheap. Carpets collect odors and require cleaning every turnover whereas hardwoods only need to be refinished about every 5 years or so.
Here are a few tips when it comes to flooring in rentals.
- Avoid engineered hardwoods with grooves in high traffic areas. They will collect grime that will be impossible to clean out.
- Use carpet runners in high traffic hallways if you want to minimize scuffs and scratches.
- If you live in a condo, you may be required to have a certain percentage of carpet to dampen sounds. You can buy a few area rugs to meet this requirement.
- Use tile or vinyl planks in kitchens and bathrooms to avoid water damage and make easy repairs when needed.
- Brian Davis of Spark Rental suggests including a shoe rack in your entryway to subtly remind tenants to protect the floors
Kitchen
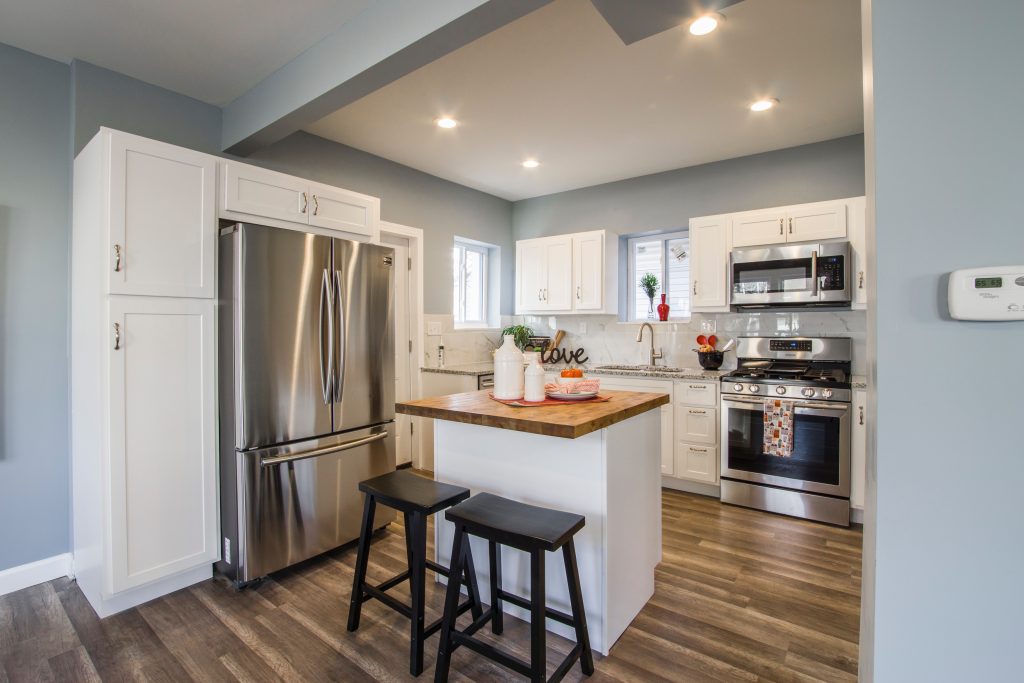
The kitchen is probably the room that sees the most wear and tear so it’s important to keep this in mind. You want to avoid fragile, high maintenance finishes. This can include granite countertops which need to be sealed every 6 months or stainless steel appliances which highlight every imperfection.
However, depending on your market, your renters may expect high-end items. If that’s the case then you need to opt for more durable finishes. For example, choose quartz countertops which don’t need to be sealed and can withstand higher heat than granite. A slate finish on your appliances might also fare better over the long run.
If you have a lower end home, you can opt for laminate countertops instead. These will last the longest and can withstand most normal wear and tear.
Here’s a list of some items to avoid in a rental kitchen:
- Sprayer hoses in sinks (they tend to break easy)
- Porcelain sinks (chips easy with sharp objects)
- Avoid cheap faucets which tend to break easy
- Butcher block or Marble countertops (high maintenance)
- Engineered hardwood floors (collects grime in between grooves)
- Trash compactor (one more thing to break)
- Cheap cabinets (tenants will tear them apart quickly)
- Expensive cabinets (tenants will eventually tear them apart)
See 9 Smart Ways To Save On A Rental Kitchen Remodel for more tips.
Walls and Doors
Following these simple tips below will help protect your walls and make turnovers faster and less expensive.
Paint
Choose the right paint finish for the right room.
Use an eggshell finish for the living room and bedrooms. You will be able to clean up small scuffs but it won’t show every imperfection like a semi-gloss finish. If you have near-perfect walls or want more protection from scuffs then go with a semi-gloss. A flat ceiling finish is ok for these rooms.
I like to go with a semi-gloss finish in the Kitchen, Bathrooms and Closets. It stands up to wear and tear better plus it can be washed to remove grease buildup. This includes the ceilings.
All trim should be in a semi-gloss finish to protect from scuffs.
Doors
Every door should have a door stopper. I like to install hinge-pin door stops in my rentals. It protects the doors but stays out of sight.
Install kick plates on the bottom of entryway doors. People tend to kick these doors open when their hands are full. This will save you the trouble of having to refinish the door every few years.
Opt for solid core doors if you can afford it. They cost more but you won’t have to worry about your tenant putting their fist through it.
Racks and Shelves
Always mount any racks or shelves to a stud. This will avoid golf-ball sized holes when your tenant’s kid tries to do pull ups on the bathroom towel rack.
Windows
Screens
Choose a screen material that can stand up to wear and tear. An aluminum screen is best for most windows.
It’s best to use a heavy duty screen material for screen doors. Look for one that is rated for pets. It’s also good for people who try walking through the high visibility ones!
Better yet, remove all screens if possible and replace them with plexiglass. This tip comes from Mr. Landlord himself.
Window Treatments
Always pre-install window treatments in your rentals. Never let a tenant do it no matter how handy they claim to be. This will ensure they are secure and your walls won’t be ruined.
Avoid cheap blinds or vertical blinds. They will get destroyed fast. I like to use blackout shades in bedrooms. They help create a darker, quieter sleeping environment for tenants. You can use a similar type blind in living areas or install curtains instead.
Other Tenant-Proofing Tips
Here are a few other things you can do to make your life as a future landlord much easier.
- Remove or shorten the chains on ceiling fans. Kids and adults both like to rip these out.
- Use dark grout colors to hide stains or go with a very narrow grout line
- Switch to LED or CFL light bulbs to save yourself the hassle later
- Use a dual fan and vent in the bathrooms. Wire them to one switch so the vent is always on when the tenant showers.
- Replace the flush mechanism with a new Fluidmaster Universal one
- Install contact paper under sinks to avoid water stains and damage
- Simplify landscaping by installing more hardscaping, mulch, rocks, etc. Avoid high maintenance plants, trees, and shrubs like magnolias and weeping willows for example.
Tax Treatment Of Pre-Rental Costs
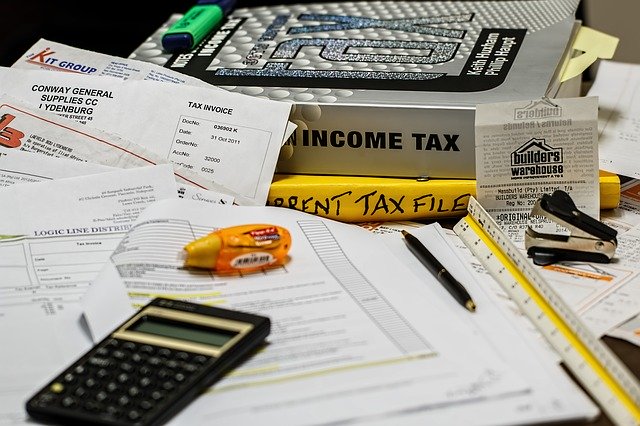
One of the biggest benefits of owning a rental property is the tax deductions. However, tax treatment of expenses incurred when getting a house rent ready can be tricky.
A little bit of pre-planning can save you a lot of taxes in your first year which is often a make-or-break period for new landlords.
There are two factors that determine the proper tax treatment for expenses incurred when getting a home ready to be rented.
1 – Placed In Service Date (Rent Ready Date)
The date your rental is placed into service is the first factor in determining tax treatment. The placed in service date marks an important milestone for tax purposes. Any operating expenses incurred prior to a rental property being placed in service must be capitalized. After that date, they can be expensed.
A property is deemed to be placed in service when it is first “placed in a condition or state of readiness and availability for a specifically assigned function.” See IRS Pub 527 for more details (see pg. 6).
For a new landlord, that essentially means when the property is ready to be occupied by a tenant. Note that the property does not need to actually be rented. It just needs to be ready for that intended purpose.
PRO TIP – Document the date you placed your rental into service. Make copies of the listing, document your tenant screening meetings, etc. You may need to prove the date you placed this property into service later.
Start Up Expenses
So what happens to operating expense incurred before the placed in service date?
Any operating expenses, including repairs and maintenance expenses, incurred before the service date can be capitalized and amortized over 15 years.
The $5,000 Rule
Luckily, you don’t have to wait 15 years to deduct some of these expenses. Instead, the tax code allows a one-time deduction of up to $5,000 of Start Up expenses.
However, any amount over the $5,000 limit must be amortized over the next 15 years.
The $50,000 Limit Rule
But there is a catch. This one time deduction is phased out if your start up expenses exceed $50,000. This phase out is dollar for dollar.
For example, if you incurred $52,000 of start-up costs, then you could only deduct $3,000 in the first year. The remaining $49,000 would have to be amortized.
Most accidental landlords won’t run in to this limit but it’s important to know that it exists.
2 – Capital vs. Operating Rent Ready Expenses
The second factor in determining tax treatment is the type of expense.
Only operating expenses can be treated as start-up expenses. In other words, only expenses that would normally qualify for in-year expense treatment can be considered start-up costs.
Capital expenses (any expense incurred to improve the value or longevity of the property) must be added to the cost basis. This cost basis will then be depreciated proportionately over the next 27.5 years for residential properties.
PRO TIP – Use your Punch List Priority Matrix to do some tax planning that will save you money in your first year of operation. Hold off on any unnecessary rent ready repairs until after you place your rental into service (when it’s ready to be rented). These can then be expensed. Also, limit your start up repairs to $5,000 to take full advantage of the in-year deduction for start-up expenses.
Conclusion
Prioritizing rental repairs is a challenge for many new landlords. It’s hard to know what needs to be done versus what is nice to do. It’s easy to get carried away and over-invest in making your home rent ready.
Using a Punch List Priority Matrix can help you sift through the list to know what repairs will provide real value to your rental business.
As you go through your punch list, be sure to prioritize repairs and improvements that will tenant-proof your rental. These rent ready repairs will pay for themselves in faster and cheaper turnovers.
You can also use your Punch List Priority Matrix to help you save on taxes in your first year by taking full advantage of the Start-Up tax deduction.
Want More Landlord Tips?
Sign up today for the Accidental Rental monthly newsletter for access to more money saving tips and special offers!


Great rent-ready list and tenant-proofing ideas!
Since you can’t always count on studs being where you need them, something I do for my rentals is mount towel bars and stair railings to a 1×4 board that is screwed into the studs. Never had a pull-out.
Great idea! I love it!
Hey great great article! Only issue I had was your comment about granite and quartz? Quartz is actually less durable than granite, quartz has a scoring temperature while granite does not, quartz is a man made product that is roughly 80% granite and 20% colored adhesives ,also quartz and granite are about 80% or so the same material so they both need sealed every 6-12 months! Other than that, very informational article that has helped me plenty!
Glad the article has helped. Yeah, the main downside with quartz is the heat. I explain this to tenants and have not had a problem yet thankfully. Good tenants don’t want to be responsible for damaging something so expensive I guess.